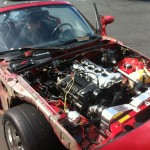
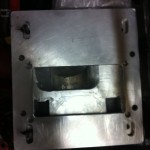
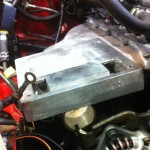
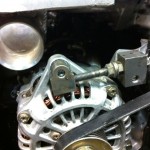
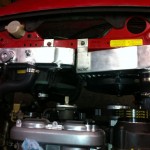
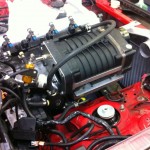
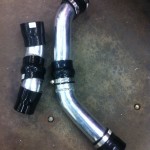
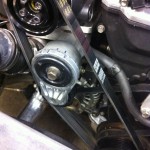
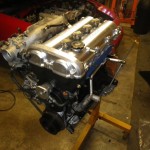
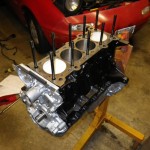
Yesterday was an important milestone: the new engine fired up in the car for the first time. I’ve been out of town a fair bit of the last 2 weeks, but I’ve been spending a ton of time on the car, so quite a bit has occurred anyway.
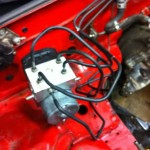 As planned, on the 9th my dad came over and we tore everything remaining out of the car. The next day, I started working on the ABS changeout. The first step was removing the old brick, which was pretty painless. To keep from losing too much fluid, I just threw the lines into the new brick in the right places while I figured out what to do next. The lines happily went in with the brick facing backwards, but that wasn’t really what I wanted. I designed the wiring harness to have the brick facing the stock direction, so I needed to fix that.
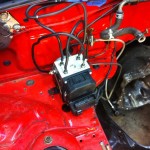 Talking to Doug, the stock lines should take the amount of abuse necessary to move everything where I needed, so I spent a while slowly massaging the lines into where I wanted them to mount and was fairly happy with the result. After the supercharger setup is in place, and I know where everything will be in final shape, I’ll cut into the lines and shorten them to be only as long as they need to be, but for now I’ve cirlycued everything to try to keep it as compact as possible while keeping stock line lengths in case I need to move it down the line. I took the stock 05 bracket, lopped off some unneeded tabs, drilled some new holes into the bottom to utilize some existing threaded holes in the NA chassis, and mounted it up solidly. This should be about as secure as the stock 05 mounting.
Next, I started on the NB subframe. I’m switching to the NB front subframe for the better suspension pickup geometry and better steering rack. Unfortunately, I didn’t realize just how many parts are involved with this. I had the rack and the subframe, not realizing that a ton of parts changed compatibility between the generations as well. So, at this point, I just swapped out the subframe and ordered a bunch more parts from Panic Motorsports and moved onto the wiring harnesses.
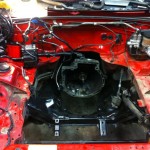 I pretty heavily modified the transmission harness. The stock harness runs a battery cable all the way down the PPF to the trunk. I’m switching to a 2.5 lb LiFe EVO2 battery, and there was more than 2.5 lbs of wiring in the harness that I could eliminate by simply moving the battery up to the engine bay, and also remove the extra native resistance of the super long cable run, to maximize the starting effectiveness of the tiny battery. As a result, I removed everything rear of the reverse sensor hookups and ran just a couple feet of the battery cable up to by where the stock fusebox goes, where I’m now mounting the battery. I made some quick battery and ground cables and I was good to go.
Next the front harness went in. I wasn’t sure how everything was going to line up, so at this point I just threw it in the engine bay, to make sure it lined up with the transmission harness, that it could reach the ABS unit, and that I didn’t miss anything obvious. Surprisingly, everything seemed fine. Wiring is everywhere, but who cares — it’s run, and, more importantly, so far everything’s happy. I tried hooking up the ignition switch, turning the key, and everything made the appropriate relay noises it should have, and nothing blew up. Taking that as a good sign, I moved on.
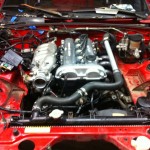 After everything was done in the car that I wanted with the motor out, I finished putting the 1.6 sensors I need (coolant temp, fan switch, oil pressure) onto the 99 motor, added the clutch and flywheel, and put it in the car. Corky still hasn’t finished the radiator, so for now I had to ghetto rig up some radiator lines to get everything to line up temporarily. I got that all working, hooked up all the sensors, filled all the fluids, and tried test firing the fuel pump to see if the fuel system would hold pressure. Then I got a face full of fuel…
I’m using the M-Tuned dual feed fuel rail, anticipating vastly increased fuel flow over the itty bitty stock rail (on the supercharger setup, not right now). It comes with a bunch of lines and fittings and adapters. I was hoping that them being NPT would be good enough to seal, but I was very wrong. So, on the first spot that leaked, I tried sealing it with Permatec high temp thread sealant, as suggested by several people on multiple message boards. I let it cure for 24 hours, per the PDF on Permatec’s site, then tried firing the pump again. That spot sealed up just fine, letting the fuel gush forth from 3 other spots simultaneously once pressure built up. Talked to a few more people and read more online, and everything pointed to getting yellow double-density teflon tape. Went to ACE Racing, picked up a roll of it, and re-built the entire rail setup using three full wraps of it on every fitting. Reassembled everything and fired the fuel pump. Everything sealed! For about 10 seconds. Then it started pouring forth through the spot that I sealed with the Permatec goop. I pulled that fitting out, cleaned everything off, let it dry, and then resealed that spot with the yellow tape. Test fired the pump again, only to realize that, now that everything was sealing, the pressure gauge on my adjustable fuel pressure regulator wasn’t moving because I had it hooked up backwards. I hooked that back up the right way, started the fuel pump again, and was able to actually adjust my base fuel pressure to 50 psi and sit there and watch it pump. Next.
At this point, new steering rack supplies showed up. The weirdly sized stock M12x1.25 fine thread bolts and a hard line and power steering pump from an NB arrived from Panic Motorsports, and I quickly installed it all, hoping to put the steering issues to rest. I got the power steering lines all hooked up and swapped the pump to the NB pump, and the whole system sealed and hooked up properly. However, I then learned that the NB rack has a bigger steering column output pinion. More research showed that I needed a new U-joint and a new intermediate steering shaft off the NB to go with the parts. A call to Panic got those on the way, and, lacking any more drivetrain stuff to do, I went back to the motor.
I’m using the AEM plug and play EMS for 90-95 Miatas. I bought it for several reasons, not least of which because Emilio touted its ability to run the 99 crank and cam angle sensors, allowing me to run sequential injection and direct fire sequential ignition. However, it has no out of the box ability to do any of these things, as I quickly discovered. I spent several hours saturday and sunday hunched in the driver’s side of the cabin, laptop on my lap, swearing at the internet, and periodically causing ear-splitting backfires as I tried to make the damn thing work. Finally, sunday afternoon, after trying several combinations of things that sounded like it kind of wanted to start, I tried doubling the fuel map (I’d scaled it up from the stock injectors to my new injector sizes,) and suddenly the engine roared to life at 3000 RPMs for a second or two and shut off. After futzing with the fuel map for a bit, I was able to get it to reliably start and idle at whatever idle value I wanted. The next step with the motor is road tuning the fuel map, which is going to require waiting until the steering components get in this week, but I’m glad that everything is running exactly how it should.
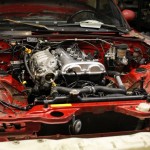 I spent this morning cleaning up the spaghetti wiring mess, fixing the tach (required soldering in a 1k resistor between power and the tach lead), making a bracket to hold the fusebox into the corner where I want it, and generally zip tying everything down to keep it tidy and from moving. This afternoon I’m going to work on installing the AIM EVO4 data system and getting it to talk to the AEM EMS, then replace my dash with the AIM.
The race transmission is being rebuilt as we speak at Advanced Autosport, and should ship to me by the end of the week, so I’m using the transmission that came in the car until the new one shows up. Doug is still working on the rear end swap (putting the diff/ring+pinion in, and adding abs rings to the non-abs axles), so I’m on the stock diff (haven’t even looked to see if it’s a VLSD) until that’s done as well. Axis Power Racing has sent the seats to the upholsterer and should be getting them back in a day or two, at which point 2 seats, a hood, and fenders will ship out to me, and I should probably end up with them early next week. So, as things stand right now, next week is looking like when the car will take on semi final shape. At that point, I can also take the car out on the road and see if this new ABS craziness actually works or not…
![10450276_628275863068_9111196888486650278_o[1]](http://www.directedconsulting.com/destinationssm/wp-content/uploads/2014/11/10450276_628275863068_9111196888486650278_o1-150x150.jpg) My last post was full of optimism for a serious attempt at a season of autocross with the car. Unfortunately, the reliability gods decided against that. Over the course of the season, pretty much everything in the engine bay caused some sort of problem. The season started with the supercharger breaking at the Crow’s Landing Prosolo before I could even take any runs, then taking way too long to get fixed because, as always, vendors suck at keeping to their promises. That caused me to get it back on a Thursday night, throw it frantically into the car (the night before the Packwood Pro), where, during practice runs, the car showered its engine bay down with oil when something else failed. Later that event, the upper ball joints broke out of their press fits, requiring frantic tearing apart of the car between run groups to get them welded back in. It’s just been a year of a series of unfortunate events everywhere I tried to take the car. In the end, after considering the option of towing my car out to nationals, I instead just went to nationals in Ron Bauer’s DP car after almost bailing on the event altogether for the first time since I started.
My last post was full of optimism for a serious attempt at a season of autocross with the car. Unfortunately, the reliability gods decided against that. Over the course of the season, pretty much everything in the engine bay caused some sort of problem. The season started with the supercharger breaking at the Crow’s Landing Prosolo before I could even take any runs, then taking way too long to get fixed because, as always, vendors suck at keeping to their promises. That caused me to get it back on a Thursday night, throw it frantically into the car (the night before the Packwood Pro), where, during practice runs, the car showered its engine bay down with oil when something else failed. Later that event, the upper ball joints broke out of their press fits, requiring frantic tearing apart of the car between run groups to get them welded back in. It’s just been a year of a series of unfortunate events everywhere I tried to take the car. In the end, after considering the option of towing my car out to nationals, I instead just went to nationals in Ron Bauer’s DP car after almost bailing on the event altogether for the first time since I started.![10172764_623243607748_4414811543945212468_n[1]](http://www.directedconsulting.com/destinationssm/wp-content/uploads/2014/11/10172764_623243607748_4414811543945212468_n1-150x150.jpg) This April, despite the Miata seeming to be in okay shape, I enacted phase 1 of my SSM contingency plan and picked up an Elise from New York and drove it back across the country to Seattle. The plan was to daily drive the car (I had been dailying our Forester for a while and was getting bored of that for some reason) and slowly just mod it into a fun and fast street car. I also knew that, in the end, it was probably a better platform for SSM than the Miata, and that it would likely someday take over, but I was thinking it’d be a couple years before that plan started unfolding. I was wrong.
This April, despite the Miata seeming to be in okay shape, I enacted phase 1 of my SSM contingency plan and picked up an Elise from New York and drove it back across the country to Seattle. The plan was to daily drive the car (I had been dailying our Forester for a while and was getting bored of that for some reason) and slowly just mod it into a fun and fast street car. I also knew that, in the end, it was probably a better platform for SSM than the Miata, and that it would likely someday take over, but I was thinking it’d be a couple years before that plan started unfolding. I was wrong.![10583987_636369762828_5461914175468102933_n[1]](http://www.directedconsulting.com/destinationssm/wp-content/uploads/2014/11/10583987_636369762828_5461914175468102933_n1-150x150.jpg) Shortly after the SC blew up at Crow’s Landing, I tentatively made the decision to move up the timetable for the Elise. The first step was that I wanted to make sure that I could actually kill two birds with one stone with the car. I wanted the true unicorn — the daily driveable SSM car, and not just “could” daily drive, actually “want to” daily drive. So, I decided that the first thing to do would be suspension/wheels/tires for the car, so that it was in basically full SSM stiffness trim and I could try that out before committing to the full build.
Shortly after the SC blew up at Crow’s Landing, I tentatively made the decision to move up the timetable for the Elise. The first step was that I wanted to make sure that I could actually kill two birds with one stone with the car. I wanted the true unicorn — the daily driveable SSM car, and not just “could” daily drive, actually “want to” daily drive. So, I decided that the first thing to do would be suspension/wheels/tires for the car, so that it was in basically full SSM stiffness trim and I could try that out before committing to the full build.![10592827_636689142788_6586557377148567369_n[1]](http://www.directedconsulting.com/destinationssm/wp-content/uploads/2014/11/10592827_636689142788_6586557377148567369_n1-150x150.jpg) While researching how I wanted to do that, an opening came up in a local performance driving school (high speed exercises + instructed lapping of Pacific Raceway) that I’d wanted my wife to take for a while. I had the perfect excuse to throw some money at the car and test it out at the same time. After talking with Fred Zust at Blackwatch Racing, we hatched a plan to quickly ship me a bunch of parts and get the car together in time for the track day. Much to my surprise, everything showed up on time and I had time to actually get the car aligned and do some shakedown on the street before the event. Needless to say, the car was a blast on the track and worked great, despite being somewhat down on power (which I later verified on the dyno as ~15% down). I daily drove the car for a couple weeks and quickly decided that I was completely fine driving the car this stiff on the street.
While researching how I wanted to do that, an opening came up in a local performance driving school (high speed exercises + instructed lapping of Pacific Raceway) that I’d wanted my wife to take for a while. I had the perfect excuse to throw some money at the car and test it out at the same time. After talking with Fred Zust at Blackwatch Racing, we hatched a plan to quickly ship me a bunch of parts and get the car together in time for the track day. Much to my surprise, everything showed up on time and I had time to actually get the car aligned and do some shakedown on the street before the event. Needless to say, the car was a blast on the track and worked great, despite being somewhat down on power (which I later verified on the dyno as ~15% down). I daily drove the car for a couple weeks and quickly decided that I was completely fine driving the car this stiff on the street.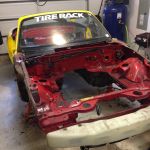 When the Miata had the several issues at the Packwood Pro, it was really the death knell, after I had already gone that deep into the Elise. In a local event right after nationals, I took the car out officially as the “last hurrah”, and, of course, to spite me, it immediately catastrophically broke again. It made it nice and easy to take the car home, roll it into the garage, throw it on jackstands, and immediately strip every sellable part from the carcass without remorse. Since then, I have been selling off the parts at a reasonable pace on all the major Miata boards.
![394603_564130770348_1855279643_n[1]](http://www.directedconsulting.com/destinationssm/wp-content/uploads/2012/08/394603_564130770348_1855279643_n1-150x150.jpg)
![552112_564130815258_974552175_n[1]](http://www.directedconsulting.com/destinationssm/wp-content/uploads/2012/08/552112_564130815258_974552175_n1-150x150.jpg)
