The story of this build has mostly been things taking longer than I thought they would. I was expecting problems like things being more expensive than I thought they’d be, but I wasn’t actually expecting so many things to just take exponentially more time than I was hoping. Almost every part of the project is a month behind at this point. Some of these things aren’t a big deal, but others are.
- The Quaife gearset I ordered still hasn’t left the UK yet, and won’t until at least friday of this week, despite that it should have been in the builder’s hands almost 2 weeks ago according to their initial promises
- Scope creep attacked the uprights project like a banshee. We kept wanting to measure more things, causing me to order new subframes, uprights, control arms, etc. We finally got everything bought and in my garage, and at this point Brian has most of the parts measured, but we were hoping to be engineering the manufacturing process by this point. This has also delayed figuring out the shock/spring/bar package that we’re going to use, but we have plans to powwow Wednesday night to determine the CG of a stock Miata as well as start doing the math on the suspension package. This may be further delayed by the impending Snowpocalypse, though.
- Corky Bell is an awesome old guy who knows way too much about superchargers and Miatas in general. Unfortunately, he’s also busy and very very slow. So, I’m still in final stages of discussing/negotiating what he’s going to fabricate for me. I think we’re nearly done, and he can start making stuff soon, but I was hoping to have an intercooler/radiator/intake manifold setup by now, instead of them all still being discussed. It means that I’m going to be getting the car running again on the 99 motor on the stock intake manifold before I even start messing with the supercharger aspect. (not the worst thing in the world)
- Getting all the right parts together for the motor took a while. The bearings didn’t come with thrust washers, so we had to source those; then we had a debate over what to do for valve locks; the windage tray didn’t quite fit right and needed to be modified; etc. Mid-build, I decided to switch to doing the coolant re-route, so I had to order a new head gasket. Fortunately, the builder says he’ll finish the motor sometime today, so I can hopefully pick it up and finish the assembly today or tomorrow.
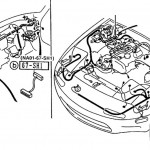
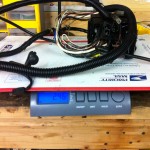
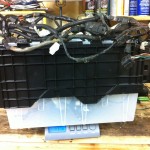 The biggest fairly unexpected delay so far is how long it took to do the front harness correctly. The front harness in the Miata is what manages the vast majority of the electronics in the car. It connects the ECU to the fusebox, the dash, the engine sensors, etc. The pictures to the right shows its extent. It’s huge, heavy, and invades every portion of the front half of the car. As it came out of the car, it weighed 17.76 lbs. And, as it turns out, I was going to change a huge portion of it.
There were several main goals with the harness modification:
- Remove everything allowed to under the rule set to save weight/complexity
- Convert from the 90-00 to the 01-05 ABS system
- Convert a bunch of sensors from the 1.6 motor to the 99 stuff (cam/crank angle sensor breakout, knock sensor) and other applicable sensors too (adding wideband oxygen sensor)
- COP (Coil-On-Plug) ignition conversion
- Convert to speed density air metering (MAP/IAT instead of AFM or MAF)
 I figured, “how hard can this be? It’s just a bunch of soldering.” Well, kinda. Mazda kinda makes their harnesses like tanks. Most wiring in the harness is covered with a thick layer of electrical tape, most of which is then covered in a plastic stretchy loom protector, which is then coated in a final layer of electrical tape to hold the slide-on loom together (and presumably to further protect it). Good for the car, bad for making it easy to hack apart. It took a couple hours alone to safely remove some of the coating for the first parts I wanted to attack. From there, the scope of the problem laid before me became more clear. Once the basic stuff was stripped, I laid the harness out in the general pattern that it sits in the car and got to work ID’ing wires and sensors. The picture at right is the middle of that process.
After spending at least 20 hours on this damn thing, my conclusion is that either the harness was designed in 4-5 successive stages by a bunch of people as they added more things to the car and moved them around, or the one person who designed it all at once is an idiot. There are multiple large gauge wires that split off from a source and then run the entire length of the harness, only to split somewhere else again and go to 2 different sensors, there are wires that go long distances only to split and then come back another long distance. So, just when you think it’s safe to snip a wire out, because you’re near the end of a harness strand, and you don’t need that sensor anymore, make sure to unravel the coating all the way up the harness to the end. A distressing amount of the time, the harness will split further up, and a smaller gauge wire will share the signal and travel back out the harness to another place, and you would have hosed that other poor sensor. After realizing all of this, things went much slower. On the bright side, it meant that anything open under the rules (anything powertrain-related, and some other stuff) I could tear apart and redo properly. I have a crate half full of just wires I tore out of the original harness that I don’t need anymore.
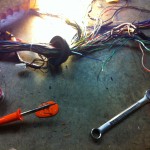 It pretty much just took forever. There were hours of researching, poring over and comparing parts diagrams for a 91, 93, 99, and 05. I had to make some executive decisions that may come back to bite me. For example, the 01+ ABS unit just has some power leads that don’t exist on the old car, and aren’t really documented where they come from on the wiring diagrams I was able to find, so I guessed. It also has a bunch of large gauge ground wires that go into the main harness on the 05 that have no counterpart at all on the 1.6, so I decided to do what the 1.6 ABS unit has and made a giant ring terminal out of all the grounds, which will bolt to the chassis, and I’ll just go ahead and pray. I also realized, the day I needed some sensor connectors, that the 05 front harness didn’t include most of the engine sensors, so I needed to buy new connectors in a hurry. Flyin Miata then sent me a wrong connector which took a little while to sort out. Lots of little delays like that happened. In the end, I learned a lot, and I tried to be really careful with all of my connections, since, once this is all in the car, debugging anything that I may have screwed up is almost impossible without tearing the entire front half of the car apart again and starting over.
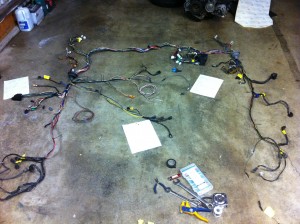 The harness is almost done at this point, as the picture to the right shows. The loop of whiteish wires at the center are the cam/crank sensor wires, and the coiled red/black wire are the IAT sensor, since I have no idea where I’m going to put it yet (we haven’t finalized an intake manifold setup.) It’s 12.2 lbs right now, which is probably the lowest it will be. I’m waiting to get the motor back from the builder so that I see exactly where the cam and crank angle sensors are, so that I can measure how long to make the wires to get to them, but the wires are run to approximately where they need to go, and are several feet longer than they could possibly need to be, so it’s only a few minutes more soldering from here. The Race Logic traction control box just showed up today as well, so that needs to be spliced into the harness, but that’s pretty straight forward as well. Once that’s all done, I’ll re-tape and loom everything again. There’s lots of ways to interpret the rules, but I’m trying to take the conservative route and will probably end up massively over-looming it.
It feels really good to finally have the hard parts done, and I actually have a decent amount of confidence that I did it correctly. I’ll still be white-knuckling it when I go to start the car, as I rewired almost every single sensor that the engine uses to run, and the fueling and ignition systems will be completely different than stock as well, all running on an AEM EMS that I’ve never touched before. I’m sure that will be a delightful evening of swearing.
Updates should be coming more fast and furious-style now. Things are finally falling into place in a more rapid fashion. I get the motor today or tomorrow morning, tomorrow we measure the CG of the stock car for some suspension calculations, and once we do that I can tear the new car apart. I got the car to pass emissions, which was a lot of fun since the car came with an exploded catalytic converter and a dead O2 sensor. Finally, I got word from the Oregon DMV that they’ve “processed” a title and it’s in the send queue. Between those two things, I’m good to dig in.
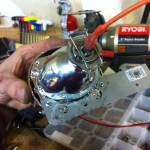 When everything arrived, I spent a surprisingly short amount of time snipping some extra metal off the H1 bulbs, removing one of the screws from the backing plate of the projector, and the projector went together and powered nicely off a 12V battery I had kicking around. The relay harness arrived shortly afterward, and I made a simple bracket out of some strap steel (for now — I’ll make a real bracket out of thicker aluminum when I have some more time) and tested it all out. Everything, surprisingly enough, worked perfectly the first time.
 I bolted it all to the car to make sure it’d fit exactly where I wanted it to (below the stock roofline), and checked the lighting pattern. Everything was great. 0.8 lbs per side for the projector setup, and I pared the relay harness down to 0.6 lbs, giving me a total of 2.2 lbs all in for the headlight setup, which is an excellent savings over the 19.2 lbs of the stock setup, and actually much brighter lighting with a better cutoff to boot. As part of the carbon fiber hood (which arrives next week), I’m getting some lexan pieces to go into the stock headlight location to protect the headlights, and everything will be complete.




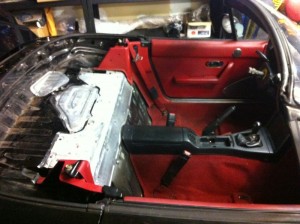 Next step: off with the soft top. The top had been pushed through at the base of the rear window, so it wasn’t doing a very good job of sealing the car. Having secured the broken (but sealed) hard top from my rolled Spec Miata car, I no longer had any need to keep the top on it anymore, and so it was time to see what the car was actually going to weigh. Off it came, revealing a soaking wet carpet and insulation layer, so out came all the removable carpeting from the rear deck and behind the seats to hang up to dry. By the time I finished weighing the car, the puddle under one of the pieces had spread to a river flowing under the garage door. I think I found most of the smell (I hope). Time to let the car continue to dry out for another few days.
