Archive for the Wiring Harnesses Category

Spring Nationals

Posted in Handling, Reliability, Wiring Harnesses on May 29, 2012 by David de Regt

Because of the alignment and truck issues, we, of course, had another frantic last minute prep session.  We spent Monday afternoon pulling the front UCAs off to bend them more, reinstalling them, and getting the car to an alignment shop with zero notice in time for them to work on it.  While some of that was in process, we had to pull the alternator off the truck and get a rebuilt alternator and install it.  That evening we finally got to clean up some last minute stuff on the car and packed up the rig to head to Lincoln.

2 days of towing later, we arrived to glorious 90 degrees and humid Lincoln, NE.  We spent Thursday doing practice starts to figure out how to launch the thing (which neither of us ever got any good at – my best 60ft was 2.01s.)  Everything was going well, so we retired to beer.

Friday (ProSolo day 1) morning, I got 3 runs then the car sputtered and died sitting in line to take my 4th run and wouldn’t restart.  We pushed it off to the 2nd driver line and let it sit for a minute.  We checked everything – nothing obvious was wrong, but a minute later we tried firing the car back up, and it happily did.  My dad then got 2 runs in before it died in the same way for him and we retired to impound.

Very perplexed, we guessed it was a fueling issue, and I’d been worried about my fuel pump since the Packwood weekend of harness melting/shorting.  So, at lunch we changed the fuel pump to the new Deutchwerks pump.  I didn’t get a right side run (apparently I rolled out of my one right side run, grr), so my dad got to go first.  We sent him out without a hood for afternoon runs, on the off chance something was overheating, to get some more ventilation into the engine bay.  He got his 4 runs in, so we hoped it was fixed and put the hood on for my runs.  I got one run before it died again briefly after I departed for my second run.  We again retired to impound and had an evening to consider.

Fortunately, I had noticed, when it wigged out on me, that the tach was going nuts, implying that the ECU had lost cam/crank sync (or something far more heinous, possibly.)  I asked around the paddock and found two very nice competitors (Bill Schenker and Mike Heinitz) that had spare crank and cam angle sensors to loan me, and swapped them onto the car.

The next day, we decided the better part of valor was to run without the hood again (but we “replaced” the hood with a strip of tape, which is technically legal under SSM rules, stupid as that may be) and I went out for my runs.  The car had no issues, and I managed to save for 3rd place, and my dad also got his 4 runs in without issue.  When we tried to start the car up again after weighing it, it wouldn’t start, or even show any signs of ignition signal.  We towed it back to the paddock and poked around at it for a bit.

I found nothing wrong, but finally decided to try swapping the main relay out for a spare I had lying around, and the car sprung to life.  That relay had likely been damaged in the wiring debacle of the Packwood weekend, but it’s still a little distressing.  The car seemed fine after that, so we declared victory and went for celebratory BBQ and beer.
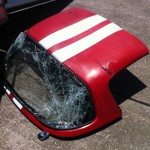
The NT went mostly without issue.  They yelled at us after the ProSolo, because apparently our exhaust was blowing 103dB consistently (limit of 100dB), so we had to attach a clamp on muffler for the tour.  I had a small power burble on day 1 in the middle of my third run, but it’s vaguely possible it was just fuel starvation.  We made it through — I got 3rd again, 1.4 off the win.  The only day two issue was when, on the way out to grid for our day 2 heat, my dad drove the truck over the hardtop I’ve been using to keep the car dry/sealed overnight, which is now forcing me to come up with some new solution…

On the drive home, so far, I’ve ordered brand new replacement relays from Mazda and also new crank and cam angle sensors.  I noticed the cam sensor and the main relay had both been superceded, and reading up on miata.net, it looks like my issues are pretty known issues, so I’m vaguely hopeful that I’ve discovered the cause(s) of my more major problems.

We also had a chance to play with the Hoosiers vs. Goodyears at the Prosolo, and we both agreed that the Goodyears make the car much more drivable, so for the forseable future, it looks like it’s going to be a Goodyear car.  They seem to be able to put down power much better, and also they don’t overheat nearly as badly as the Hoosiers do, both of which are good things for an SSM car, especially at a hot site like Lincoln.

I hopefully will have time coming up to work on some of the other projects for the car: a front brakes solution, possibly moving to a permanent carbon hard top, venting the hood for real, tuning the rear wing, canards, etc.  The really short summary, though, is that the car, for its first showing, when it was working, proved that a Miata can get it done in SSM (if I stopped driving like such an idiot.)  So, despite all the other stresses of the weekend, it was a resounding success.  I also had some more time to mess with the data system that I’m developing, and worked some of the usability kinks out, which was helpful at the events and should be even more useful as the year goes on…
Second Packwood weekend and Spring Nationals Leadups

Posted in Delays, Handling, Suspension, Traction Control, Wiring Harnesses on May 29, 2012 by David de Regt

It’s been an incredibly hectic two weeks.  I spent a couple days tearing into more of the electrics and found that the fuel pump wire down the driver’s side of the rear harness had rubbed through to the chassis, which is probably what started everything.  I ran a new thicker gauge wire and re-loomed/moved some of the harness, so it should hopefully never rub through again, and the thicker wire will be less prone to heating.  I also ordered a Deutchwerks 300LPH pump due to my decreased confidence in the Walbro, intending to use it as a spare if the Walbro died.  Finally, I moved the fusebox out from under the side of the engine bay into a spot near the intake with some airflow, in case it just needed some ventilation as well.

The subframe that we were told existed wasn’t actually the right subframe, which we didn’t discover until after close of business Thursday night.  We got to wake up early Friday morning and call every parts shop in the area to find a new subframe.  The only one we could get before Monday wouldn’t be pulled until 5pm that night, 2 hours from home.  So, we picked it up, got back home around 7:30pm, and spent the entire night swapping the subframe and front control arms.  Shaikh finished up the shocks Thursday night and overnighted them so those arrived Friday morning, and when we finished with the subframe, we got to also assemble/swap the new shocks (mounting canisters, etc.)  Around 11:30pm we finally finished with all the work, then spent until almost 2am doing a ride height set and string alignment.  We realized the alignment wasn’t going terribly well, and we couldn’t get enough camber out of the front anyway, so we called it good enough for a shakedown and went to bed.

We decided that waking up in 3 hours and driving to Packwood for the morning session was out of the question, so we went down for the afternoon, which was a nice dry day, and had no major issues at all with the car.  The car was pretty loose, but still drivable, and we settled into liking a RaceLogic setting of 20% slip and 5.0mph wheel differential.  Sunday morning we woke up to a wet ground and ongoing rain, and we ran a very wet morning session, where we got to throw on the Hoosier Wets (225/50/15 H2Os on 15×9 6ULs) and play with the RaceLogic to figure out a wet setup, which worked out quite well.  We tried 5%, which seemed pretty good, but 10% was really the sweet spot, if you had quick enough hands.  The car is remarkably drivable in the wet, which is good to know.  On a very representative course, I was only 0.4 behind the Hyman GT-R car in full wet trim, which is closer than I would have hoped to get.  We had no issues with the car in the wet either, called it a day, and drove home.

On the tow home, the alternator on the truck let go, though, adding some more insult to the existing injury.  Nothing is ever easy…

Dyno Attempt #1

Posted in Delays, Dyno, Engine, Wiring Harnesses on March 19, 2012 by David de Regt

On 3 hours of sleep, I ran down to get some 100 octane race gas, threw some more 92 into the SSM car, and we loaded it up into my dad’s trailer to haul down to the dyno (the car still doesn’t have a hood or fenders, and it’s an unknown drivetrain, so towing seemed to be a good idea — this proved to be a good decision).  We unloaded the car, I quickly wired up the TPS while Andre (of Pina Motorsports) started laying in a base tune and configuring anything I’d missed on the car, and then we loaded it onto the dyno.  We made it about 1/3 of the way through the base fuel map when suddenly the motor backfired lightly, cut out, and refused to even pretend to start again.

We debugged a bit and found that the cam/crank sensors weren’t syncing properly, and were in fact syncing largely randomly.  We tried messing with it for a bit, but to no avail.  We did a quick compression check on #1 and found no compression, which implied something far more serious was wrong and decided to call it a day.  We loaded up the car and brought it back home, tail between our legs.

After getting some sleep (I was a zombie at this point), the next day I tore the valve cover and the timing covers off the motor and started toying around.  I quickly realized that while the cams were in sync relative to each other, and the crank pulley was correctly marking TDC (verified), they were nowhere close to correct relative to each other.  I assumed the Gates belt I’d used stretched and the belt had slipped, so I ordered a new timing belt and tensioner spring and started messing with other stuff in the car.

The next day, I figured I should tear the rest of the front of the motor off so that when the belt got there, I could just throw it on.  While I was disassembling, I realized that I could spin the crank and the cams weren’t spinning.  When I got the crank pulley off, I realized the issue.  I’m using a bolt-on 6 rib pulley from Fast Forward Superchargers that mounts into the stock 4 bolts on the front of the pulley.  What I did not notice, however, is that the hole in the center is about 1mm too small for the crank bolt to pass through.  So, while everything torqued together properly, the bolt was over 1cm too far out from where it needed to be, so the woodruff key was no longer held in place.  After running long enough, it managed to vibrate its way out of the timing pulley and let it spin freely on the crank, while holding the normal crank pulley in place.  With that mystery solved, I properly reassembled everything in the correct order, and went back to finishing up some rewiring while waiting for the coil that I left at the dyno to be mailed to me.

I’m using this delay to redo some wiring in the bay that needed to happen — moving things like the TPS, IAC, IAT, etc. around in the front harness to properly reflect where they’d moved to in the final configuration, which should clean up the engine bay quite a bit and make the car easier to work on.  I’m also installing a console-switchable fan onto the intercooler for waiting in grid.  Tomorrow the coil should arrive and I can try firing the car up again, and then take it to the dyno later this week to try again, hopefully with more success…

It’s Alive!

Posted in ABS, Engine, Subframes, Wiring Harnesses on February 20, 2012 by David de Regt

Yesterday was an important milestone: the new engine fired up in the car for the first time.  I’ve been out of town a fair bit of the last 2 weeks, but I’ve been spending a ton of time on the car, so quite a bit has occurred anyway.

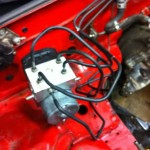
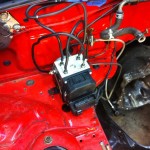
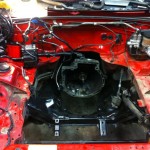
As planned, on the 9th my dad came over and we tore everything remaining out of the car.  The next day, I started working on the ABS changeout.  The first step was removing the old brick, which was pretty painless.  To keep from losing too much fluid, I just threw the lines into the new brick in the right places while I figured out what to do next.  The lines happily went in with the brick facing backwards, but that wasn’t really what I wanted.  I designed the wiring harness to have the brick facing the stock direction, so I needed to fix that.

Talking to Doug, the stock lines should take the amount of abuse necessary to move everything where I needed, so I spent a while slowly massaging the lines into where I wanted them to mount and was fairly happy with the result.  After the supercharger setup is in place, and I know where everything will be in final shape, I’ll cut into the lines and shorten them to be only as long as they need to be, but for now I’ve cirlycued everything to try to keep it as compact as possible while keeping stock line lengths in case I need to move it down the line.  I took the stock 05 bracket, lopped off some unneeded tabs, drilled some new holes into the bottom to utilize some existing threaded holes in the NA chassis, and mounted it up solidly.  This should be about as secure as the stock 05 mounting.

Next, I started on the NB subframe.  I’m switching to the NB front subframe for the better suspension pickup geometry and better steering rack.  Unfortunately, I didn’t realize just how many parts are involved with this.  I had the rack and the subframe, not realizing that a ton of parts changed compatibility between the generations as well.  So, at this point, I just swapped out the subframe and ordered a bunch more parts from Panic Motorsports and moved onto the wiring harnesses.

I pretty heavily modified the transmission harness.  The stock harness runs a battery cable all the way down the PPF to the trunk.  I’m switching to a 2.5 lb LiFe EVO2 battery, and there was more than 2.5 lbs of wiring in the harness that I could eliminate by simply moving the battery up to the engine bay, and also remove the extra native resistance of the super long cable run, to maximize the starting effectiveness of the tiny battery.  As a result, I removed everything rear of the reverse sensor hookups and ran just a couple feet of the battery cable up to by where the stock fusebox goes, where I’m now mounting the battery.  I made some quick battery and ground cables and I was good to go.

Next the front harness went in.  I wasn’t sure how everything was going to line up, so at this point I just threw it in the engine bay, to make sure it lined up with the transmission harness, that it could reach the ABS unit, and that I didn’t miss anything obvious.  Surprisingly, everything seemed fine.  Wiring is everywhere, but who cares — it’s run, and, more importantly, so far everything’s happy.  I tried hooking up the ignition switch, turning the key, and everything made the appropriate relay noises it should have, and nothing blew up.  Taking that as a good sign, I moved on.

After everything was done in the car that I wanted with the motor out, I finished putting the 1.6 sensors I need (coolant temp, fan switch, oil pressure) onto the 99 motor, added the clutch and flywheel, and put it in the car.  Corky still hasn’t finished the radiator, so for now I had to ghetto rig up some radiator lines to get everything to line up temporarily.  I got that all working, hooked up all the sensors, filled all the fluids, and tried test firing the fuel pump to see if the fuel system would hold pressure.  Then I got a face full of fuel…

I’m using the M-Tuned dual feed fuel rail, anticipating vastly increased fuel flow over the itty bitty stock rail (on the supercharger setup, not right now).  It comes with a bunch of lines and fittings and adapters.  I was hoping that them being NPT would be good enough to seal, but I was very wrong.  So, on the first spot that leaked, I tried sealing it with Permatec high temp thread sealant, as suggested by several people on multiple message boards.  I let it cure for 24 hours, per the PDF on Permatec’s site, then tried firing the pump again.  That spot sealed up just fine, letting the fuel gush forth from 3 other spots simultaneously once pressure built up.  Talked to a few more people and read more online, and everything pointed to getting yellow double-density teflon tape.  Went to ACE Racing, picked up a roll of it, and re-built the entire rail setup using three full wraps of it on every fitting.  Reassembled everything and fired the fuel pump.  Everything sealed!  For about 10 seconds.  Then it started pouring forth through the spot that I sealed with the Permatec goop.  I pulled that fitting out, cleaned everything off, let it dry, and then resealed that spot with the yellow tape.  Test fired the pump again, only to realize that, now that everything was sealing, the pressure gauge on my adjustable fuel pressure regulator wasn’t moving because I had it hooked up backwards.  I hooked that back up the right way, started the fuel pump again, and was able to actually adjust my base fuel pressure to 50 psi and sit there and watch it pump.  Next.

At this point, new steering rack supplies showed up.  The weirdly sized stock M12x1.25 fine thread bolts and a hard line and power steering pump from an NB arrived from Panic Motorsports, and I quickly installed it all, hoping to put the steering issues to rest.  I got the power steering lines all hooked up and swapped the pump to the NB pump, and the whole system sealed and hooked up properly.  However, I then learned that the NB rack has a bigger steering column output pinion.  More research showed that I needed a new U-joint and a new intermediate steering shaft off the NB to go with the parts.  A call to Panic got those on the way, and, lacking any more drivetrain stuff to do, I went back to the motor.

I’m using the AEM plug and play EMS for 90-95 Miatas.  I bought it for several reasons, not least of which because Emilio touted its ability to run the 99 crank and cam angle sensors, allowing me to run sequential injection and direct fire sequential ignition.  However, it has no out of the box ability to do any of these things, as I quickly discovered.  I spent several hours saturday and sunday hunched in the driver’s side of the cabin, laptop on my lap, swearing at the internet, and periodically causing ear-splitting backfires as I tried to make the damn thing work.  Finally, sunday afternoon, after trying several combinations of things that sounded like it kind of wanted to start, I tried doubling the fuel map (I’d scaled it up from the stock injectors to my new injector sizes,) and suddenly the engine roared to life at 3000 RPMs for a second or two and shut off.  After futzing with the fuel map for a bit, I was able to get it to reliably start and idle at whatever idle value I wanted.  The next step with the motor is road tuning the fuel map, which is going to require waiting until the steering components get in this week, but I’m glad that everything is running exactly how it should.

I spent this morning cleaning up the spaghetti wiring mess, fixing the tach (required soldering in a 1k resistor between power and the tach lead), making a bracket to hold the fusebox into the corner where I want it, and generally zip tying everything down to keep it tidy and from moving.  This afternoon I’m going to work on installing the AIM EVO4 data system and getting it to talk to the AEM EMS, then replace my dash with the AIM.

The race transmission is being rebuilt as we speak at Advanced Autosport, and should ship to me by the end of the week, so I’m using the transmission that came in the car until the new one shows up.  Doug is still working on the rear end swap (putting the diff/ring+pinion in, and adding abs rings to the non-abs axles), so I’m on the stock diff (haven’t even looked to see if it’s a VLSD) until that’s done as well.  Axis Power Racing has sent the seats to the upholsterer and should be getting them back in a day or two, at which point 2 seats, a hood, and fenders will ship out to me, and I should probably end up with them early next week.  So, as things stand right now, next week is looking like when the car will take on semi final shape.  At that point, I can also take the car out on the road and see if this new ABS craziness actually works or not…

Delays and the Front Harness

Posted in Delays, Engine Conversion, Lightening, Traction Control, Wiring Harnesses on January 17, 2012 by David de Regt

The story of this build has mostly been things taking longer than I thought they would.  I was expecting problems like things being more expensive than I thought they’d be, but I wasn’t actually expecting so many things to just take exponentially more time than I was hoping.  Almost every part of the project is a month behind at this point.  Some of these things aren’t a big deal, but others are.

  • The Quaife gearset I ordered still hasn’t left the UK yet, and won’t until at least friday of this week, despite that it should have been in the builder’s hands almost 2 weeks ago according to their initial promises
  • Scope creep attacked the uprights project like a banshee.  We kept wanting to measure more things, causing me to order new subframes, uprights, control arms, etc.  We finally got everything bought and in my garage, and at this point Brian has most of the parts measured, but we were hoping to be engineering the manufacturing process by this point.  This has also delayed figuring out the shock/spring/bar package that we’re going to use, but we have plans to powwow Wednesday night to determine the CG of a stock Miata as well as start doing the math on the suspension package.  This may be further delayed by the impending Snowpocalypse, though.
  • Corky Bell is an awesome old guy who knows way too much about superchargers and Miatas in general.  Unfortunately, he’s also busy and very very slow.  So, I’m still in final stages of discussing/negotiating what he’s going to fabricate for me.  I think we’re nearly done, and he can start making stuff soon, but I was hoping to have an intercooler/radiator/intake manifold setup by now, instead of them all still being discussed.  It means that I’m going to be getting the car running again on the 99 motor on the stock intake manifold before I even start messing with the supercharger aspect. (not the worst thing in the world)
  • Getting all the right parts together for the motor took a while.  The bearings didn’t come with thrust washers, so we had to source those; then we had a debate over what to do for valve locks; the windage tray didn’t quite fit right and needed to be modified; etc.  Mid-build, I decided to switch to doing the coolant re-route, so I had to order a new head gasket.  Fortunately, the builder says he’ll finish the motor sometime today, so I can hopefully pick it up and finish the assembly today or tomorrow.

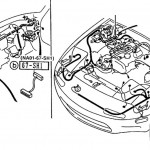
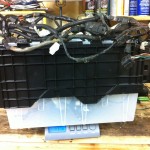
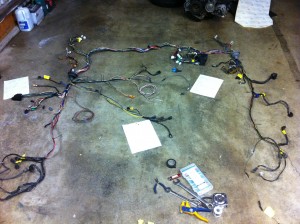
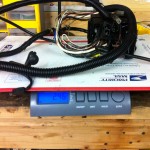
The biggest fairly unexpected delay so far is how long it took to do the front harness correctly.  The front harness in the Miata is what manages the vast majority of the electronics in the car.  It connects the ECU to the fusebox, the dash, the engine sensors, etc.  The pictures to the right shows its extent.  It’s huge, heavy, and invades every portion of the front half of the car.  As it came out of the car, it weighed 17.76 lbs.  And, as it turns out, I was going to change a huge portion of it.

There were several main goals with the harness modification:

  1. Remove everything allowed to under the rule set to save weight/complexity
  2. Convert from the 90-00 to the 01-05 ABS system
  3. Convert a bunch of sensors from the 1.6 motor to the 99 stuff (cam/crank angle sensor breakout, knock sensor) and other applicable sensors too (adding wideband oxygen sensor)
  4. COP (Coil-On-Plug) ignition conversion
  5. Convert to speed density air metering (MAP/IAT instead of AFM or MAF)

I figured, “how hard can this be?  It’s just a bunch of soldering.”  Well, kinda.  Mazda kinda makes their harnesses like tanks.  Most wiring in the harness is covered with a thick layer of electrical tape, most of which is then covered in a plastic stretchy loom protector, which is then coated in a final layer of electrical tape to hold the slide-on loom together (and presumably to further protect it).  Good for the car, bad for making it easy to hack apart.  It took a couple hours alone to safely remove some of the coating for the first parts I wanted to attack.  From there, the scope of the problem laid before me became more clear.  Once the basic stuff was stripped, I laid the harness out in the general pattern that it sits in the car and got to work ID’ing wires and sensors.  The picture at right is the middle of that process.

After spending at least 20 hours on this damn thing, my conclusion is that either the harness was designed in 4-5 successive stages by a bunch of people as they added more things to the car and moved them around, or the one person who designed it all at once is an idiot.  There are multiple large gauge wires that split off from a source and then run the entire length of the harness, only to split somewhere else again and go to 2 different sensors, there are wires that go long distances only to split and then come back another long distance.  So, just when you think it’s safe to snip a wire out, because you’re near the end of a harness strand, and you don’t need that sensor anymore, make sure to unravel the coating all the way up the harness to the end.  A distressing amount of the time, the harness will split further up, and a smaller gauge wire will share the signal and travel back out the harness to another place, and you would have hosed that other poor sensor.  After realizing all of this, things went much slower.  On the bright side, it meant that anything open under the rules (anything powertrain-related, and some other stuff) I could tear apart and redo properly.  I have a crate half full of just wires I tore out of the original harness that I don’t need anymore.

It pretty much just took forever.  There were hours of researching, poring over and comparing parts diagrams for a 91, 93, 99, and 05.  I had to make some executive decisions that may come back to bite me.  For example, the 01+ ABS unit just has some power leads that don’t exist on the old car, and aren’t really documented where they come from on the wiring diagrams I was able to find, so I guessed.  It also has a bunch of large gauge ground wires that go into the main harness on the 05 that have no counterpart at all on the 1.6, so I decided to do what the 1.6 ABS unit has and made a giant ring terminal out of all the grounds, which will bolt to the chassis, and I’ll just go ahead and pray.  I also realized, the day I needed some sensor connectors, that the 05 front harness didn’t include most of the engine sensors, so I needed to buy new connectors in a hurry.  Flyin Miata then sent me a wrong connector which took a little while to sort out.  Lots of little delays like that happened.  In the end, I learned a lot, and I tried to be really careful with all of my connections, since, once this is all in the car, debugging anything that I may have screwed up is almost impossible without tearing the entire front half of the car apart again and starting over.

The harness is almost done at this point, as the picture to the right shows.  The loop of whiteish wires at the center are the cam/crank sensor wires, and the coiled red/black wire are the IAT sensor, since I have no idea where I’m going to put it yet (we haven’t finalized an intake manifold setup.)  It’s 12.2 lbs right now, which is probably the lowest it will be.  I’m waiting to get the motor back from the builder so that I see exactly where the cam and crank angle sensors are, so that I can measure how long to make the wires to get to them, but the wires are run to approximately where they need to go, and are several feet longer than they could possibly need to be, so it’s only a few minutes more soldering from here.  The Race Logic traction control box just showed up today as well, so that needs to be spliced into the harness, but that’s pretty straight forward as well.  Once that’s all done, I’ll re-tape and loom everything again.  There’s lots of ways to interpret the rules, but I’m trying to take the conservative route and will probably end up massively over-looming it.

It feels really good to finally have the hard parts done, and I actually have a decent amount of confidence that I did it correctly.  I’ll still be white-knuckling it when I go to start the car, as I rewired almost every single sensor that the engine uses to run, and the fueling and ignition systems will be completely different than stock as well, all running on an AEM EMS that I’ve never touched before.  I’m sure that will be a delightful evening of swearing.

Updates should be coming more fast and furious-style now.  Things are finally falling into place in a more rapid fashion.  I get the motor today or tomorrow morning, tomorrow we measure the CG of the stock car for some suspension calculations, and once we do that I can tear the new car apart.  I got the car to pass emissions, which was a lot of fun since the car came with an exploded catalytic converter and a dead O2 sensor.  Finally, I got word from the Oregon DMV that they’ve “processed” a title and it’s in the send queue.  Between those two things, I’m good to dig in.

General Progress and Engine Harness

Posted in Lightening, Wiring Harnesses on December 23, 2011 by David de Regt

The last couple weeks have largely been spent organizing, cleaning, and selling parts from the old black car.  That took an unexpected amount of time, though I’ve been pleased with the results.  I’ve recouped around 1800$ from parts selling, the frame is gone from my possession, and I still have a couple shelves of stuff left to sell.  The time setback is annoying, as it’s going to be 2012 before I even get into the new car, but everything always goes slow in a car build.  I keep reading Jason Rhoades’ STX build blog and seeing how much worse it could really be.  I’m still waiting on any word back from the Oregon DMV, so the new car’s now just sitting untouched in my garage, waiting for some sign that I do legally own it.

At least some things are still moving forward.  I dropped all of the motor parts off at the machine shop a week ago, so I’ll have a built 99 motor ready to go sometime relatively soon.  I also managed to stumble upon a great deal for Quaife gearsets, so I’ve ordered a set of the wide ratio Quaife gears, which are going to go straight to Advanced Autosports, who will rebuild a 94-97 tranny with them, and I should only be out around 2700$ for what should be a brand new bulletproof gearbox when all is said and done.  The 1.8 rear end is at Chase Race getting the OS Giken differential installed onto a 4.3 ring and pinion and he’s pressing the ABS rings installed onto the axles as well.  So, the non-supercharger-related portions of the drivetrain are coming together nicely.

While waiting for some long-running SQL queries today, I decided to dig into the wiring harnesses a bit.  I have the 93 LE California front harness spread out on the floor, I’ve bought an 05 MSM front harness (for a number of useful connectors), and the 93 LE engine harness is also there.  The front harness is going to be a giant hassle, as I need to tear apart both front harnesses, remove a bunch of wiring from the 93 harness, add a bunch of wiring from the 05 harness, and add more custom wires yet for the coil on plug conversion I’m doing.  I’m still waiting on a shop manual that I ordered to know what the 05 wiring harness consists of, but I thought I should get the ball rolling on the engine harness.

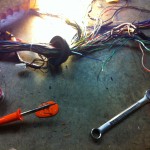
The engine harness usually runs along the intake side of the engine, all the way down the transmission/PPF, into the trunk, where the battery is.  In the factory configuration, there’s a big cable (~6 gauge) that runs the whole length (~10 feet) to connect the battery from the trunk to the electronics in the engine bay.  I’ve picked up a tiny 2.5 lb lithium battery to use for the car, so it seemed silly to bother running a cable that weighs more than that just to run it to the trunk. So, I tore into the harness, removed all the various clips and such, the one airbag sensor wire, and cut off most of the battery wire to the trunk.

I’m not positive where I’m going to mount the battery yet in the engine bay, so I wanted to leave myself a little wiggle room.  There’s probably another half pound that can come off it if I put the battery where I suspect I will (near the fusebox), but that’ll be easy down the line anyway.  The harness went from 5.22 lb down to 2.46 lb.  Easy weight reduction, and simplifying the electrical system while I’m at it.

The next two projects are the front harness and finalizing the radiator/intercooler/intake manifold setup so I can get BEGi started on the fabrication.