Archive for February, 2012

Tightening Schedule

Posted in Delays on February 29, 2012 by David de Regt

Despite the massive number of delays I’ve been through in the last couple months, the project has still been steadily moving forward.  At this point, I’m actually caught up with everything that’s arrived, and I’m basically waiting on the last parts to show up (and for Doug to have enough time to do some fab work) for the build to finish.

After getting the car to start up a week ago, I’d barely run it at all.  It has been rainy out (and the car didn’t have a hood or a top or anything to keep the water out), and I haven’t had much free time, so I was working on the headlight project and cleaning up a bunch of electrical loose ends.  I didn’t want to run the engine much since the worst way to break a race engine in is idling it in the garage.  Tuesday, though, I needed to get the car over to Doug’s to get a temporary exhaust put on (connecting the stock exhaust to the Racing Beat header) so that I could street tune the car without getting arrested on noise complaints.  That meant I actually needed to get the car to drive, so I spent a few hours futzing with the tune, debugging some issues (the traction control ECU was left connected but not set up, so as soon as I went above 2250 RPMs with the car in motion, it started fuel cutting — that took me a while to figure out), and working on a base map that’d get the car to drive.  Eventually I got it all worked out and drove a very loud open-header Miata 20 minutes over to Chase Race, while trying to break in the motor and not rupture an eardrum, and the car made it over without any issues whatsoever.

The car comes back to me tomorrow, with cut rear fenders, a real battery bracket made up (the battery has been loose in the engine bay), and a working exhaust.  From there I can debug the traction control ECU and test out the 99 ABS unit (and the brakes in general) and finish breaking in the motor.

Tomorrow (thursday), the new intake manifold/supercharger mount arrive in the mail.  I can start test fitting that to the car and figuring out a tensioning system as soon as that shows up.  The radiator/intercooler ship out of BEGi on Friday, the carbon parts (hood, fenders, and seats) ship out of St. Louis tomorrow (thursday), the new throttle body and connectors all shipped out today, and some miscellaneous stuff (boost gauge and hood pins) will ship out tomorrow.  As such, the supercharger hopefully gets mounted and tested late next week, Doug can do the full custom 2.75″ exhaust on the 13th, and I can then immediately get the car tuned on the 14th.  This puts me ready for the Slush #1 event on the 18th for the car’s first event.  This, of course, assumes that nothing goes wrong between now and then…

Headlights

Posted in Headlights, Lightening on February 29, 2012 by David de Regt

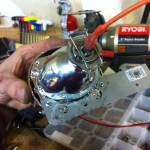
I figured I’d make a quick post about the headlights I whipped up.  I’ve been trying to order the ORACLE headlight kit from GoMiata for months, but they kept jerking me around saying it was going to be in stock in a couple days, order it now, yadda.  After that happening a few times I got tired of it and cancelled the order entirely.  It was an ugly kit anyway, and 600$ + shipping, so I figured I could do better, for cheaper.

I talked to The Retrofit Source and told them what I was looking for — a high and low beam real projector unit, as simple and lightweight as possible.  They suggested their Morimoto Mini H1 Bi-Projector, which is 120$ for a pair.  It’s made to go with xenon bulbs, but with a little shaving a normal halogen H1 bulb would fit, he said.  Works for me.  I ordered a pair of those, a 35$ relay harness to split up the stock high/low beam into the different wiring I’d need to power the bi-projector, and a pair of cheapo HELLA H1 bulbs off Amazon, and waited a week.

When everything arrived, I spent a surprisingly short amount of time snipping some extra metal off the H1 bulbs, removing one of the screws from the backing plate of the projector, and the projector went together and powered nicely off a 12V battery I had kicking around.  The relay harness arrived shortly afterward, and I made a simple bracket out of some strap steel (for now — I’ll make a real bracket out of thicker aluminum when I have some more time) and tested it all out.  Everything, surprisingly enough, worked perfectly the first time.

I bolted it all to the car to make sure it’d fit exactly where I wanted it to (below the stock roofline), and checked the lighting pattern.  Everything was great.  0.8 lbs per side for the projector setup, and I pared the relay harness down to 0.6 lbs, giving me a total of 2.2 lbs all in for the headlight setup, which is an excellent savings over the 19.2 lbs of the stock setup, and actually much brighter lighting with a better cutoff to boot.  As part of the carbon fiber hood (which arrives next week), I’m getting some lexan pieces to go into the stock headlight location to protect the headlights, and everything will be complete.

It’s Alive!

Posted in ABS, Engine, Subframes, Wiring Harnesses on February 20, 2012 by David de Regt

Yesterday was an important milestone: the new engine fired up in the car for the first time.  I’ve been out of town a fair bit of the last 2 weeks, but I’ve been spending a ton of time on the car, so quite a bit has occurred anyway.
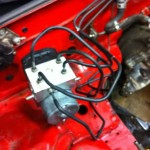
As planned, on the 9th my dad came over and we tore everything remaining out of the car.  The next day, I started working on the ABS changeout.  The first step was removing the old brick, which was pretty painless.  To keep from losing too much fluid, I just threw the lines into the new brick in the right places while I figured out what to do next.  The lines happily went in with the brick facing backwards, but that wasn’t really what I wanted.  I designed the wiring harness to have the brick facing the stock direction, so I needed to fix that.
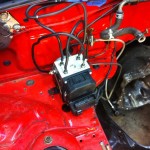
Talking to Doug, the stock lines should take the amount of abuse necessary to move everything where I needed, so I spent a while slowly massaging the lines into where I wanted them to mount and was fairly happy with the result.  After the supercharger setup is in place, and I know where everything will be in final shape, I’ll cut into the lines and shorten them to be only as long as they need to be, but for now I’ve cirlycued everything to try to keep it as compact as possible while keeping stock line lengths in case I need to move it down the line.  I took the stock 05 bracket, lopped off some unneeded tabs, drilled some new holes into the bottom to utilize some existing threaded holes in the NA chassis, and mounted it up solidly.  This should be about as secure as the stock 05 mounting.

Next, I started on the NB subframe.  I’m switching to the NB front subframe for the better suspension pickup geometry and better steering rack.  Unfortunately, I didn’t realize just how many parts are involved with this.  I had the rack and the subframe, not realizing that a ton of parts changed compatibility between the generations as well.  So, at this point, I just swapped out the subframe and ordered a bunch more parts from Panic Motorsports and moved onto the wiring harnesses.
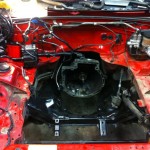
I pretty heavily modified the transmission harness.  The stock harness runs a battery cable all the way down the PPF to the trunk.  I’m switching to a 2.5 lb LiFe EVO2 battery, and there was more than 2.5 lbs of wiring in the harness that I could eliminate by simply moving the battery up to the engine bay, and also remove the extra native resistance of the super long cable run, to maximize the starting effectiveness of the tiny battery.  As a result, I removed everything rear of the reverse sensor hookups and ran just a couple feet of the battery cable up to by where the stock fusebox goes, where I’m now mounting the battery.  I made some quick battery and ground cables and I was good to go.

Next the front harness went in.  I wasn’t sure how everything was going to line up, so at this point I just threw it in the engine bay, to make sure it lined up with the transmission harness, that it could reach the ABS unit, and that I didn’t miss anything obvious.  Surprisingly, everything seemed fine.  Wiring is everywhere, but who cares — it’s run, and, more importantly, so far everything’s happy.  I tried hooking up the ignition switch, turning the key, and everything made the appropriate relay noises it should have, and nothing blew up.  Taking that as a good sign, I moved on.
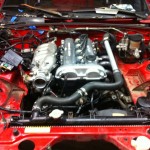
After everything was done in the car that I wanted with the motor out, I finished putting the 1.6 sensors I need (coolant temp, fan switch, oil pressure) onto the 99 motor, added the clutch and flywheel, and put it in the car.  Corky still hasn’t finished the radiator, so for now I had to ghetto rig up some radiator lines to get everything to line up temporarily.  I got that all working, hooked up all the sensors, filled all the fluids, and tried test firing the fuel pump to see if the fuel system would hold pressure.  Then I got a face full of fuel…

I’m using the M-Tuned dual feed fuel rail, anticipating vastly increased fuel flow over the itty bitty stock rail (on the supercharger setup, not right now).  It comes with a bunch of lines and fittings and adapters.  I was hoping that them being NPT would be good enough to seal, but I was very wrong.  So, on the first spot that leaked, I tried sealing it with Permatec high temp thread sealant, as suggested by several people on multiple message boards.  I let it cure for 24 hours, per the PDF on Permatec’s site, then tried firing the pump again.  That spot sealed up just fine, letting the fuel gush forth from 3 other spots simultaneously once pressure built up.  Talked to a few more people and read more online, and everything pointed to getting yellow double-density teflon tape.  Went to ACE Racing, picked up a roll of it, and re-built the entire rail setup using three full wraps of it on every fitting.  Reassembled everything and fired the fuel pump.  Everything sealed!  For about 10 seconds.  Then it started pouring forth through the spot that I sealed with the Permatec goop.  I pulled that fitting out, cleaned everything off, let it dry, and then resealed that spot with the yellow tape.  Test fired the pump again, only to realize that, now that everything was sealing, the pressure gauge on my adjustable fuel pressure regulator wasn’t moving because I had it hooked up backwards.  I hooked that back up the right way, started the fuel pump again, and was able to actually adjust my base fuel pressure to 50 psi and sit there and watch it pump.  Next.

At this point, new steering rack supplies showed up.  The weirdly sized stock M12x1.25 fine thread bolts and a hard line and power steering pump from an NB arrived from Panic Motorsports, and I quickly installed it all, hoping to put the steering issues to rest.  I got the power steering lines all hooked up and swapped the pump to the NB pump, and the whole system sealed and hooked up properly.  However, I then learned that the NB rack has a bigger steering column output pinion.  More research showed that I needed a new U-joint and a new intermediate steering shaft off the NB to go with the parts.  A call to Panic got those on the way, and, lacking any more drivetrain stuff to do, I went back to the motor.

I’m using the AEM plug and play EMS for 90-95 Miatas.  I bought it for several reasons, not least of which because Emilio touted its ability to run the 99 crank and cam angle sensors, allowing me to run sequential injection and direct fire sequential ignition.  However, it has no out of the box ability to do any of these things, as I quickly discovered.  I spent several hours saturday and sunday hunched in the driver’s side of the cabin, laptop on my lap, swearing at the internet, and periodically causing ear-splitting backfires as I tried to make the damn thing work.  Finally, sunday afternoon, after trying several combinations of things that sounded like it kind of wanted to start, I tried doubling the fuel map (I’d scaled it up from the stock injectors to my new injector sizes,) and suddenly the engine roared to life at 3000 RPMs for a second or two and shut off.  After futzing with the fuel map for a bit, I was able to get it to reliably start and idle at whatever idle value I wanted.  The next step with the motor is road tuning the fuel map, which is going to require waiting until the steering components get in this week, but I’m glad that everything is running exactly how it should.
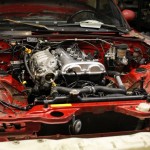
I spent this morning cleaning up the spaghetti wiring mess, fixing the tach (required soldering in a 1k resistor between power and the tach lead), making a bracket to hold the fusebox into the corner where I want it, and generally zip tying everything down to keep it tidy and from moving.  This afternoon I’m going to work on installing the AIM EVO4 data system and getting it to talk to the AEM EMS, then replace my dash with the AIM.

The race transmission is being rebuilt as we speak at Advanced Autosport, and should ship to me by the end of the week, so I’m using the transmission that came in the car until the new one shows up.  Doug is still working on the rear end swap (putting the diff/ring+pinion in, and adding abs rings to the non-abs axles), so I’m on the stock diff (haven’t even looked to see if it’s a VLSD) until that’s done as well.  Axis Power Racing has sent the seats to the upholsterer and should be getting them back in a day or two, at which point 2 seats, a hood, and fenders will ship out to me, and I should probably end up with them early next week.  So, as things stand right now, next week is looking like when the car will take on semi final shape.  At that point, I can also take the car out on the road and see if this new ABS craziness actually works or not…
And Then Things Sped Up

Posted in Delays on February 8, 2012 by David de Regt

In the last 2 days since the Timeline post, I’ve heard back from Axis and Corky Bell.  Corky says the manifold is done and he’s starting on the intercooler and radiator later this week.  Axis just finished the hood, which is 4.7 lbs, and sealed a deal with an upholstery guy to make the seats, which will be done in a couple weeks.  Suddenly things are looking up.

Yesterday, I swapped the seat in the KLiata to get it back to stock seats and seatbelts, and hence I’ve stolen the harness bar and 4-point harness out of there to put in the SSM car.  I ordered a new 5 point camlock harness to go with it for when the seats arrive, and will decide whether to use the boss frog harness bar, have Doug fabricate a new one, or simply bolt them to the rear deck.

Today, I finished the wiring harnesses.  I’ve stripped out the dash and interior of the car, and I’ve been going through the dash and rear harnesses, removing everything allowed (radio, speakers, etc.)  The car is now on jackstands, fluids drained, and my dad’s going to come over and help me pull the motor tomorrow night, along with the front end and the rest of the interior.

From there, I can put the new front harness in, followed by the motor and the changed interior, and start teething the EMS/motor combo while Corky finishes the supercharger setup.  This will give me a couple weeks to try to get everything in the car running naturally aspirated before the rest of the setup arrives.  From there, I can add the transmission, rear end, and supercharger as things show up, and it’s entirely possible I’ll have a car, albeit sans aero, ready in time for the beginning of the season.  I’m suddenly pretty excited about this, and worried that I’m going to be limited by my free time, not by parts arrivals, over the next couple weeks here…

Timeline

Posted in Delays on February 6, 2012 by David de Regt

At this point, I need to start thinking about when the car will first be ready to turn a wheel in anger.  The motor is built, but many more pieces need to fall into place before the car is usable.  I’ve stripped out most of the interior of the car, replaced the rear finish panel (the one on the car was broken), and pulled everything out of the trunk that I’m allowed to (since the battery is going in the engine bay).  Hopefully by the end of this week, I’ll have the full drivetrain out on the floor, the dash out, and the rear and dash harnesses lightened (removing radio wiring).  However, I’m still waiting on a bunch of things:

  • The gearset for the transmission just got to Advanced Autosports late last week.  He says he’s going to start on it Wednesday and that I should have that back to me sometime the week of the 20th.
  • Doug is still getting his shop together, but he can hopefully get the OS Giken installed onto the R/P and into the pumpkin (and install the ABS rings on the non-ABS axles) by about the same time as the transmission gets here.
  • Axis Power Racing is currently making me a CF hood which should be done and to me sometime the week of the 20th as well.  Once that gets here, I’ll need to get Doug to fabricate 2 hood pin mounts for the rear corners.
  • Axis Power Racing is also making me 2 seats, which are going to take at least a week longer than that (he’s still trying to find a new upholsterer), so that date is still completely unknown.
  • I’m talking with Axis Power Racing about making some custom CF fenders that are cut out to clear the giant wheels, and to not bother going widebody.  Date unknown.
  • I need to figure out a harness solution by the time the seats get here, but I think it’s just going to be getting two 4-point harnesses and bolting the harnesses to the rear deck.  This will require more light fab by Doug as well.
  • I’ve bought some double adjustable custom shocks (and springs) from FatCat Motorsports.  He’s not sure exactly when they’re going to be done, but there’s a remote possibility it will be ready by early March.  I also need to buy some spring rubbers from him so that I can tune the spring rates on the fly.
  • I have no idea when Corky Bell is going to get this manifold done or when he’s going to even quote me for making the radiator and/or intercooler.
  • I have emails out to Ciro Designs and Don Nimi for some more information on availability of some next gen twin element wings.  When I last talked to both of them (last year), they were hoping to have stuff shipping by March-ish, but who knows how much their goals will have slipped in a couple months.
  • Given that the motor isn’t even in the car yet, who knows if I’ve messed something critical up with the massive wiring harness changes I’ve made, or with the ABS, so I’m sure there’s a bunch of teething to go on there.

The first event of the year up here is March 11th.  Looking at the above, if lots of cards fall into place, it’s a feasible goal to have the car running in basically extended CSP trim in time for that first event of the year and start a bit of teething.  However, it’s contingent upon Axis getting me seats in time and FatCat getting me suspension.  The car can then improve incrementally once it’s in basic running shape, and hopefully by mid April I’ll have a supercharger and aero and can start testing the car for real.

Motor Build

Posted in Delays, Engine on February 6, 2012 by David de Regt

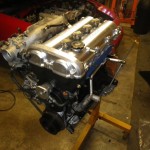
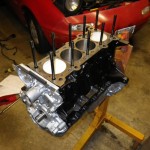
The motor build ended up, like everything else on this project, taking longer than expected.  Mazda Motorsports sent me some wrong parts, I kept deciding to replace more parts (hoses, o-rings, etc.), and then the M-Tuned rail didn’t fit right.  Every step of getting new parts is another week down the hatch, and waiting for a decent response from M-Tuned took a while too.  Last night, though, I finally made the final necessary modifications (read: liberal application of angle grinder) and bolted the last things to the motor.  It’s now basically ready to go in (sans needing a few sensors off the 1.6 motor that’s still in the car) so I should probably talk about it a little bit.

The motor is, actually, a somewhat mild build.  It started life as a running-but-smoking 99 motor that I got from Panic Motorsports (who are awesome, by the way.)  I was planning on just throwing the motor into the car as it sat so that I could start figuring out the EMS/wiring harness situation piecemeal, but as the schedule continued to push back, I decided to just go ahead and do the full build straight off the bat.  So, I gave it to Eastside Machine, the guy who’s done all my motor work for the last several years, and got it back with a bunch of nice new goodies installed.  I had them assemble the short block and head separately, and I took it from there.

For the block, I replaced the oiling system with 2002+ parts.  The later motor has a better windage tray/support plate, and the later oil pan fits it without modification, so I just used both. The new oil pump theoretically flows a little better as well.  I got some unnamed H-beam rods from 949 Racing and paired them with the crazy Wiseco pistons that Flyin Miata sells.  I’m using a stock crankshaft, wrapped in ACL Main and Rod bearings, held in with ARP main studs.  The full rotating assembly was balanced, then the clutch/pressure plate were balanced to it separately.

The head is pretty mild as well.  I’m basically just using everything Supertech sells.  1mm oversize valves all around, with their spring/retainer/seat combo pack.  Stock cams should make the wide torqueband I want, but can be reevaluated later if necessary.  I’m keeping the 99 puck-on-bucket shim system for now.  I’m only planning on spinning this thing to 8000 RPMs (for now?) so nothing too intense is necessary on that end of things under the current plans.  My main question is if the head will flow well enough without doing any other major modifications for the amount of air I’m going to be cramming through it, but there are several other people on MiataTurbo that are making similar power, with less built motors, so I’m hopefully safe.

I’m doing a coolant reroute (using the BEGi kit, flipped around), so I’m using a 99 head gasket (which has the fully spread-out coolant passages), and holding everything together with ARP head studs.  I’m going to be using a half-width radiator on the driver’s side, so I’m running the coolant re-route down the hot side of the motor, which will keep all of the cooling system on that half of the car.  The intercooler will be on the passenger half of the radiator opening, so that can keep all of the forced induction goodies on that half of the engine bay.  Hopefully this will keep everything as clean as possible in what I’m sure will be a crammed full engine bay…

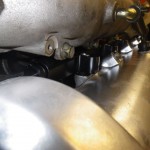
For fueling I’m running the M-Tuned dual feed fuel rail with 725cc Injector Dynamics injectors with an adjustable rising rate fuel pressure regulator.  The M-Tuned rail intersected the valve cover, so I had to grind down the tips a few mm so that it would clear.  I also had to grind away a bit of the third rib of the upper half of the 99 intake manifold so that it would clear the rail.  Nothing too major, but it all needed to happen or else it wouldn’t bolt in and tighten.  Finally, I’m doing the standard Toyota 1ZZ coil-on-plug conversion (you can see it in the picture of the motor at the top of the post).  I got the very nicely designed mounting plate from Trackspeed, which made mounting easy.  These will be sparking through the NGK race plugs that Flyin Miata sells.  I’m trying out gapping them at 0.030 to begin with, and we’ll go from there.

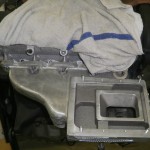
As you’ve probably noticed, for the first phase here, the motor is going in without a supercharger.  This will let me try to work kinks out of the wiring harness and get the EMS up and running happily without also dealing with forced induction.  Corky Bell is fabbing me up a custom intake manifold with integrated supercharger mount (see pic at right), but it’s unclear how long that’s going to take before it’s ready.  That’s the vision, though.